
Transform glass jars and dried pinecones into elegant festive centerpieces to light up your home on Christmas Eve without overspending.
The holiday decoration doesn’t have to be expensive or generate waste. In fact, some of the warmest and coziest ideas come from giving everyday objects a second life. Reusing glass jars (such as jam or preserves jars) is a perfect base for creating magical candle holders.
If you’re looking for a rustic and elegant style for your festive table, this guide will show you how to combine recycled glass with dried pinecones and natural foliage. By following the reference photo, you’ll achieve a spectacular centerpiece or ornament in just a few minutes.
Materials needed for the project (Based on the reference)
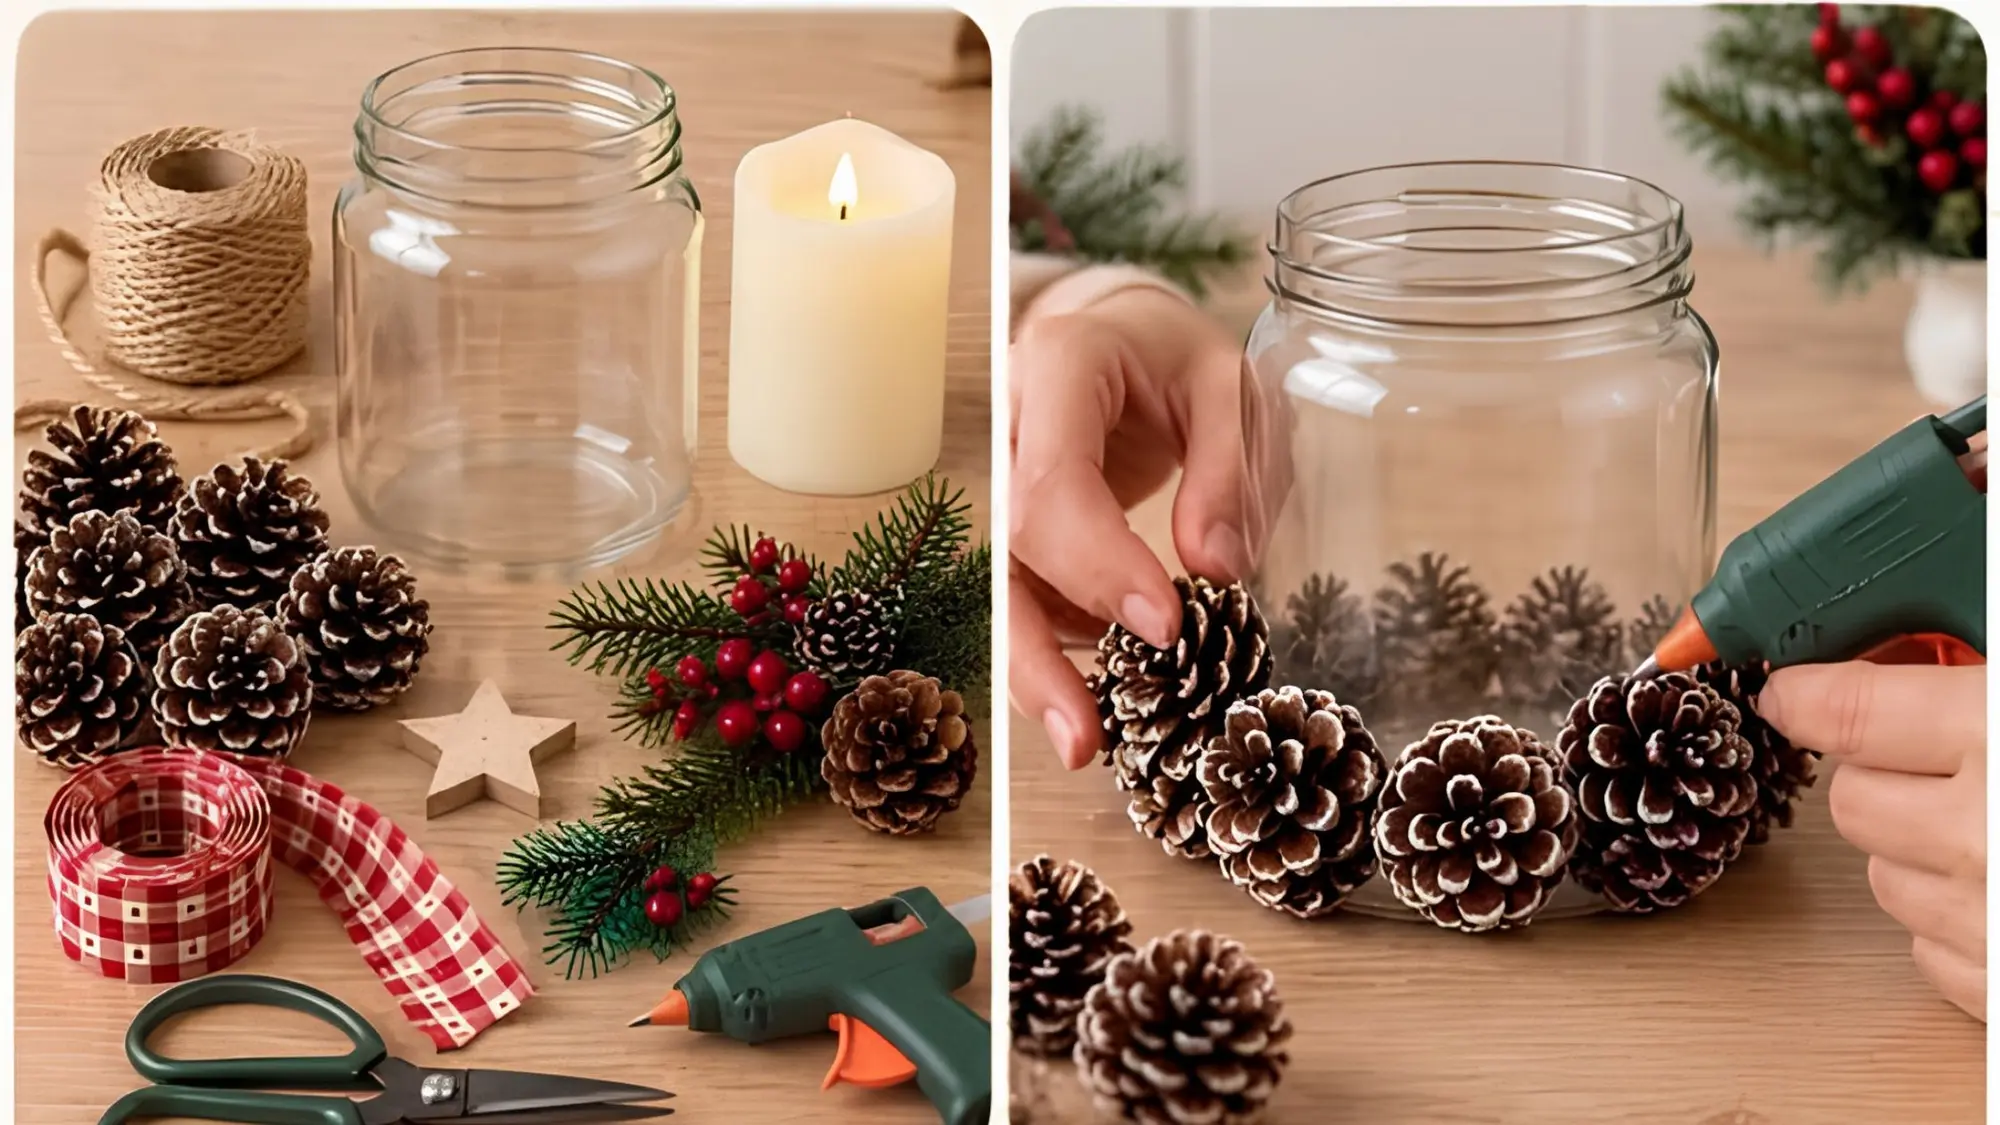
As shown in the image, you’ll need to gather the following items:
-
Clean glass jars: You can use varied sizes, making sure to remove labels and any glue residues.
-
Dried pinecones: Of different sizes, clean and dry.
-
Hot glue gun and sticks: Essential for quick and sturdy adhesion.
-
Candles: Pillar candles in white or ivory that fit comfortably inside the jar.
-
Decorative ribbon: A rustic red and white grid fabric ribbon.
-
Twine or jute rope: For hanging details and knots.
-
Natural elements: Pine or fir sprigs (fresh or artificial) and red berries (such as holly).
-
Decorative accents: Small wooden stars for hanging.
-
Tools: Scissors.
Paso a paso: How to assemble your rustic centerpiece (like in the photo)
This project is divided into very clear phases, as illustrated by the reference image.
Phase 1: Collection and Preparation
Make sure you have all the materials laid out on the work surface. Clean the jars thoroughly and confirm that the pinecones are dry so the silicone sticks well.
Phase 2: Wrapping the Base
In this stage, you will use the silicone gun to glue the pinecones around the base of the glass jar.
-
The secret: Don’t aim for perfection in symmetry; the irregularity of the pinecones will give it a rustic touch. Apply a drop of silicone at the base of each pinecone and press it against the glass, starting from the base and moving upward to cover the first band of the jar.
Phase 3: Decoration and Knots
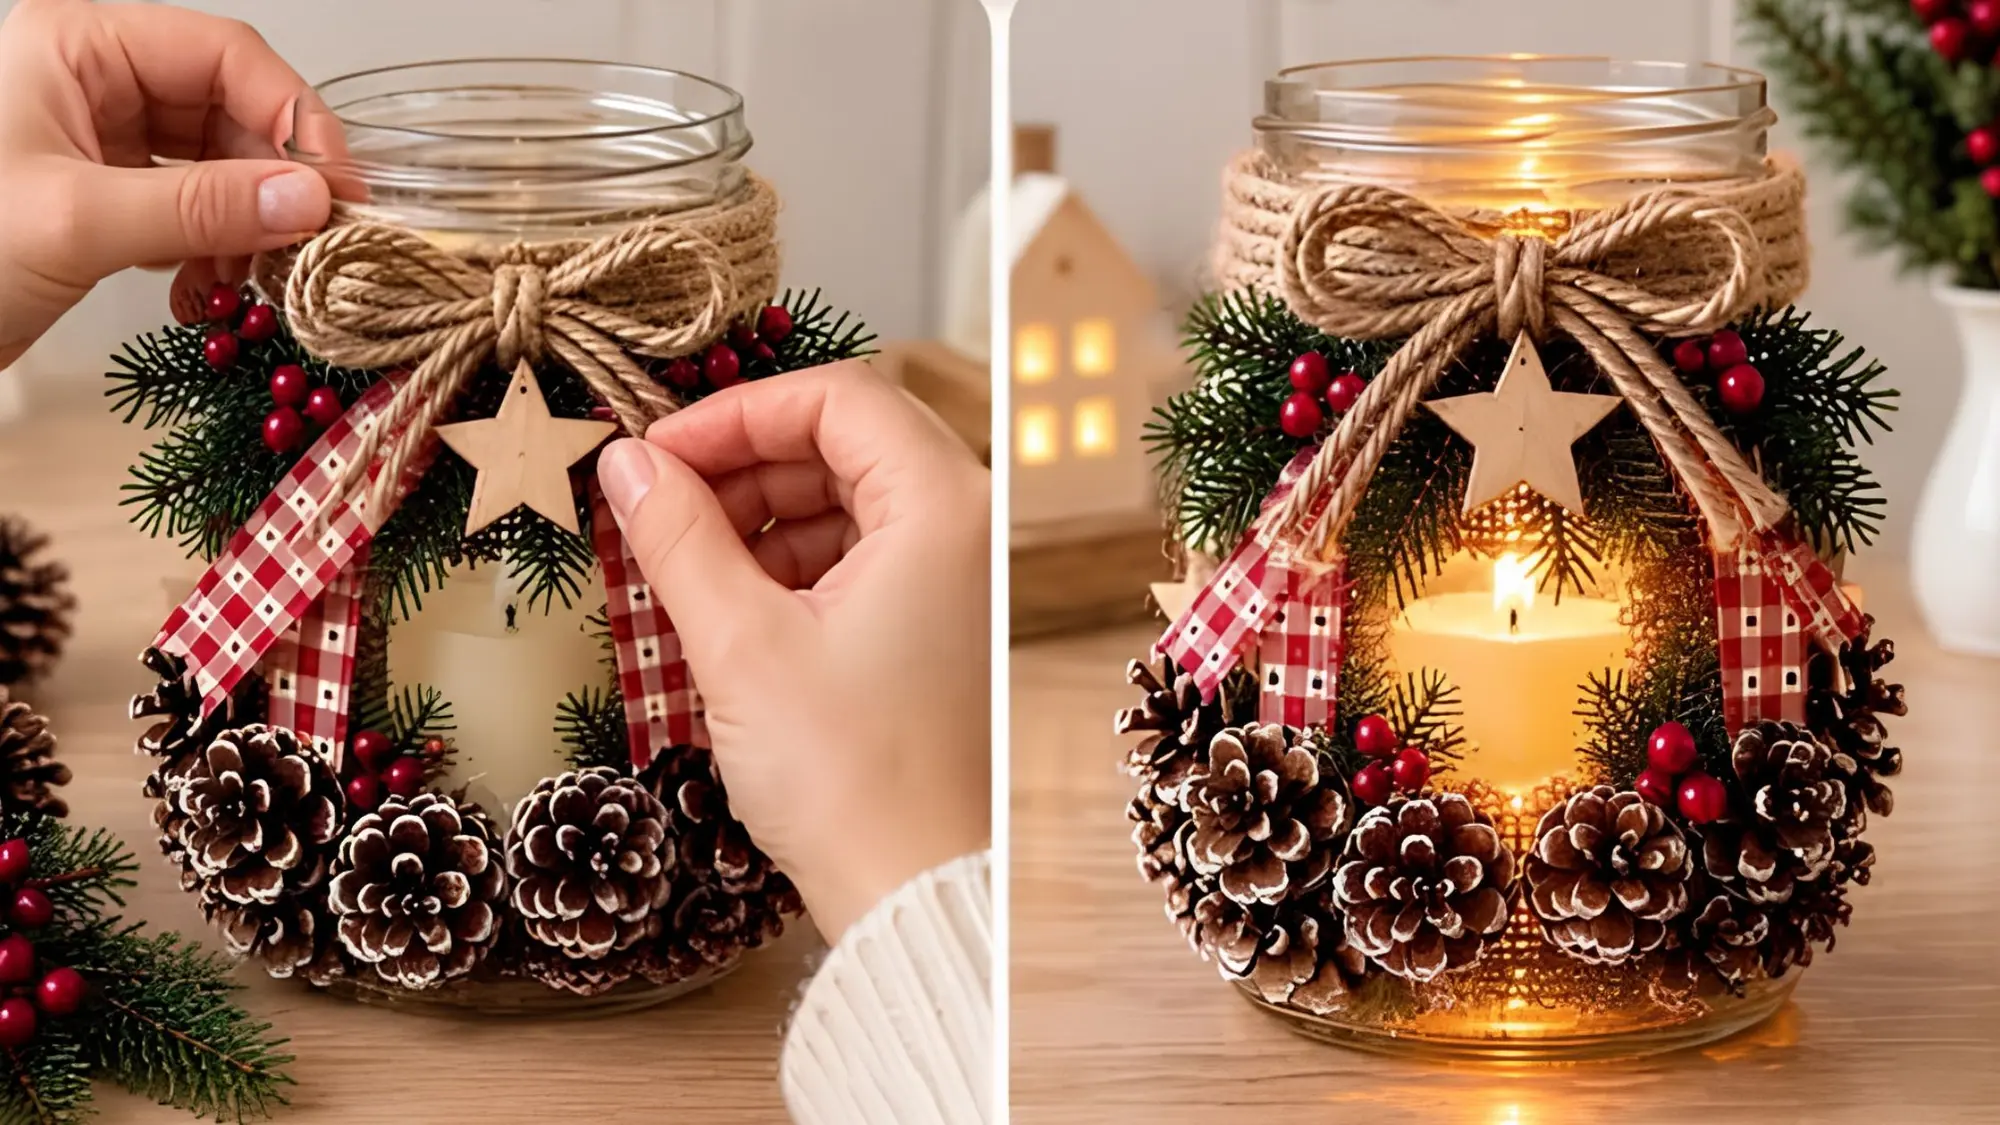
It’s time to give the jar neck a festive and rustic touch.
-
The foliage: Insert pine sprigs and red berries between the rim of the jar and the pinecones you already glued. This will add volume and color.
-
The jute: Wrap jute rope several times around the neck of the jar to cover the threading. Tie a pretty knot and let the ends hang.
-
The star: Hang the small wooden star from one end of the jute.
-
The bow: With the red and white grid ribbon, make a stylish bow and glue or tie it over the jute knot, as seen in the third image.
Craft tip: For a more wintry effect, you can apply a thin layer of white glue to the tips of the pinecones and sprinkle white glitter or coarse salt to mimic snow.
The Final Result: Magical Lighting
Once the silicone has dried, place the pillar candle inside the jar. When lit (as in the fourth reference image), the light will filter spectacularly through the pinecones and foliage, creating a warm and cozy atmosphere in your home.
Useful precaution
-
Hot silicone handling and fire safety: Use the silicone gun carefully to avoid burns. Once the candle is lit inside the ornament, ensure that the natural foliage and the jute rope are kept at a safe distance from the flame to prevent accidental fires. Never leave a burning candle unattended.
