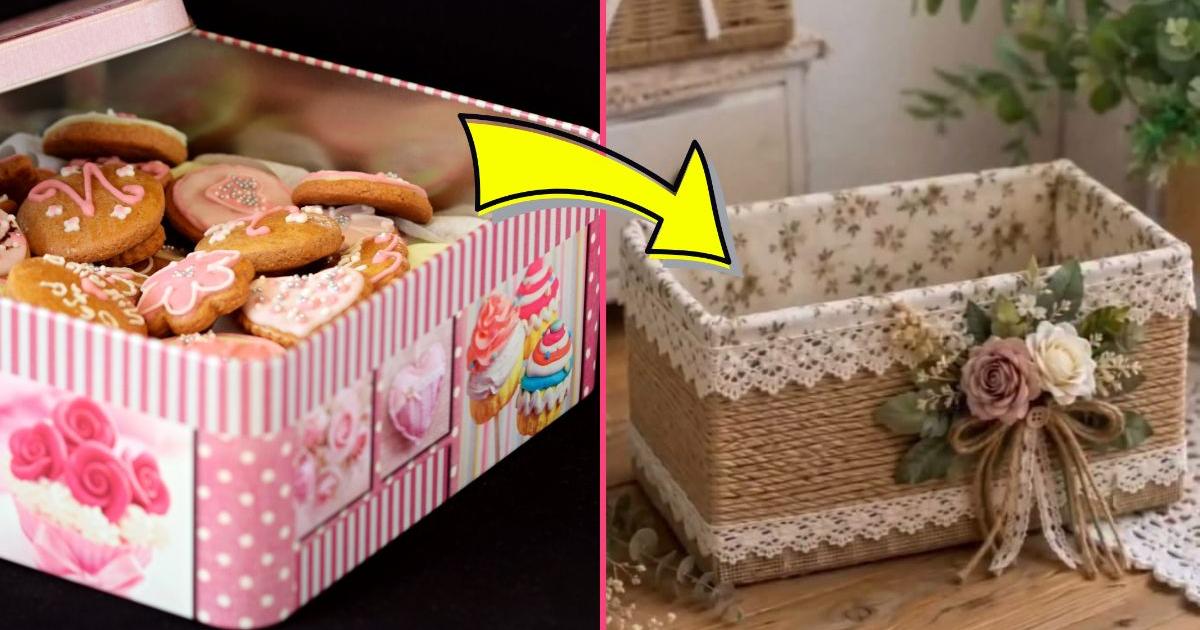
Do you have a cookie tin stored away in some corner of your house? You’re probably familiar with the habit of reusing them to store threads, needles, buttons and other sewing items, just as our grandmothers did. Although this remains a good way to repurpose them, you can also give them a second life with a simple craft and some materials you may already have at home.
On this occasion, we share with you an idea to transform that classic cookie tin into an organizer with a rustic and delicate style. The proposal consists of covering the exterior with jute cord, adding fabric on the top and placing a strip of lace to give it a nicer finish. The result is a container that looks handmade from scratch and that you can adapt to the decor of different spaces.
You can use it in the kitchen to store tea sachets, napkins or small utensils, but it also works for organizing bathroom accessories, stationery items, cosmetics or any object that needs a place of its own. Here we explain how to do it step by step.
How to make a cookie tin organizer step by step
Materials
-
A cookie tin.
-
Jute cord or cotton string.
-
Linen fabric, burlap or cotton in beige or natural color.
-
White lace or a crochet trim.
-
A piece of thick cardboard.
-
Hot glue or strong craft glue.
-
Scissors.
-
Ruler and pencil.
-
A thin ribbon or cord to make a bow.
Step-by-step Instructions
Step 1. Prepare and line the exterior base. First, cut a piece of fabric large enough to cover the bottom of the box on the outside. Apply a small amount of glue to the surface and carefully position the fabric so there are no wrinkles. Then make small cuts along the edges, not reaching the center, so you can fold each section toward the sides and glue it around the base.
Step 2. Place the jute cord around the box. Once the base is ready, take the jute cord and start gluing it from the bottom of the exterior. Apply the glue in small sections and lay the cord in horizontal lines, side by side, until the surface is covered. Continue until you reach the height you want to leave free for the fabric and lace.
Step 3. Line the top edge with fabric. Now cut a strip of fabric long enough to wrap around the top of the box and leave a few centimeters extra to fold inward. Glue the fabric to the outer face of the edge, make sure it stays straight and then fold the excess inward to cover the metal rim. You can make small folds at the corners or curves so the material adapts better to the shape of the box.
Step 4. Prepare the interior bottom. To make the organizer look nice inside as well, use a piece of thick cardboard and trace the exact shape and measurements of the box’s base onto it. Cut the piece, cover it with the same fabric you used on the exterior, and glue the edges toward the back. When ready, place it on the interior bottom of the container.
Step 5. Add the lace and the decorative bow. Finally, glue a strip of lace around the top of the jute, just below the fabric. Make sure the design sits at the same height all around and join the ends in a discreet area. Then, use a thin cord or ribbon to form a bow on the front.
