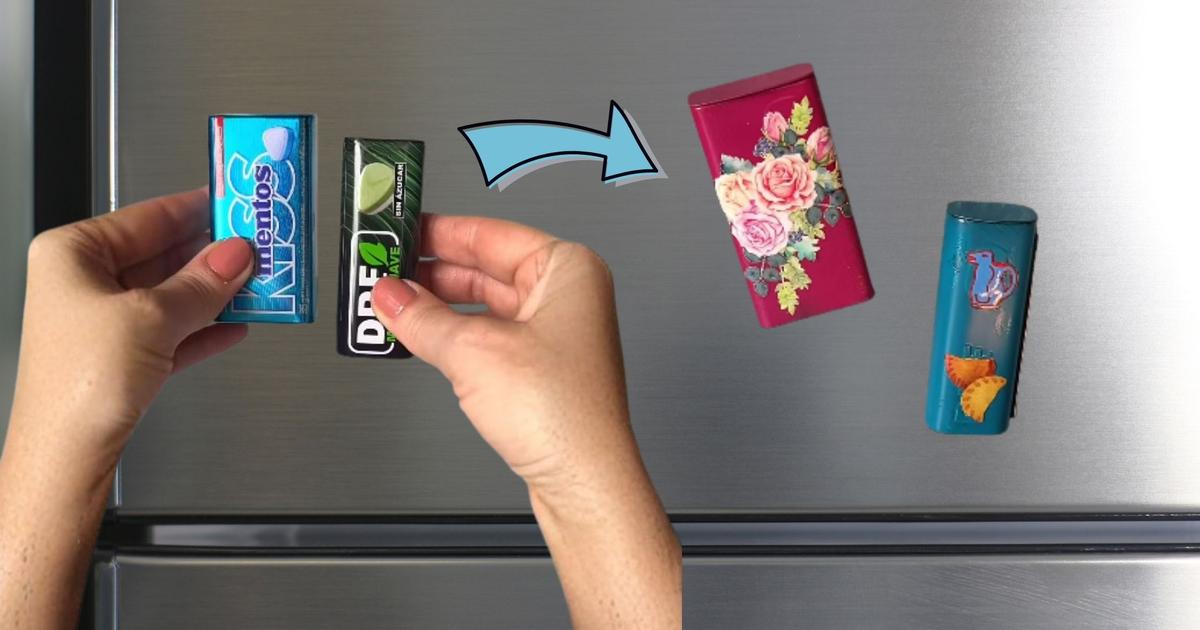
Turn those small empty mint tins into a handy magnetic match holder to keep at hand on the fridge.
¿Cuántas veces has terminado unas mint pills y te has quedado con su pequeña metal tin sin saber qué hacer con ella? En lugar de tirarlas a la basura, puedes darles una segunda vida muy útil y decorativa en tu cocina.
Con una simple transformación, estas latas se convierten en el accesorio perfecto para almacenar cerillos o fósforos y mantenerlos siempre listos junto a tus velas o estufa gracias a un imán.
A continuación, te compartimos los materiales necesarios y el paso a paso detallado para realizar este proyecto de reciclaje exprés.
Materials and Tools Needed
Main Materials
-
Mini mint-pill tins, empty and clean.
-
Spray paint in the color of your choice.
-
A strip of fine sandpaper.
-
A traditional box of matches (to take advantage of the friction area).
-
A flat magnet or a piece of adhesive magnet.
-
Decorative stickers or decals.
Support Tools
-
A cloth with alcohol or multipurpose cleaner.
-
All-purpose glue or liquid silicone.
-
Scissors.
Step by Step: How to Assemble Your Magnetic Match Holder
1. Cleaning and Surface Prep
-
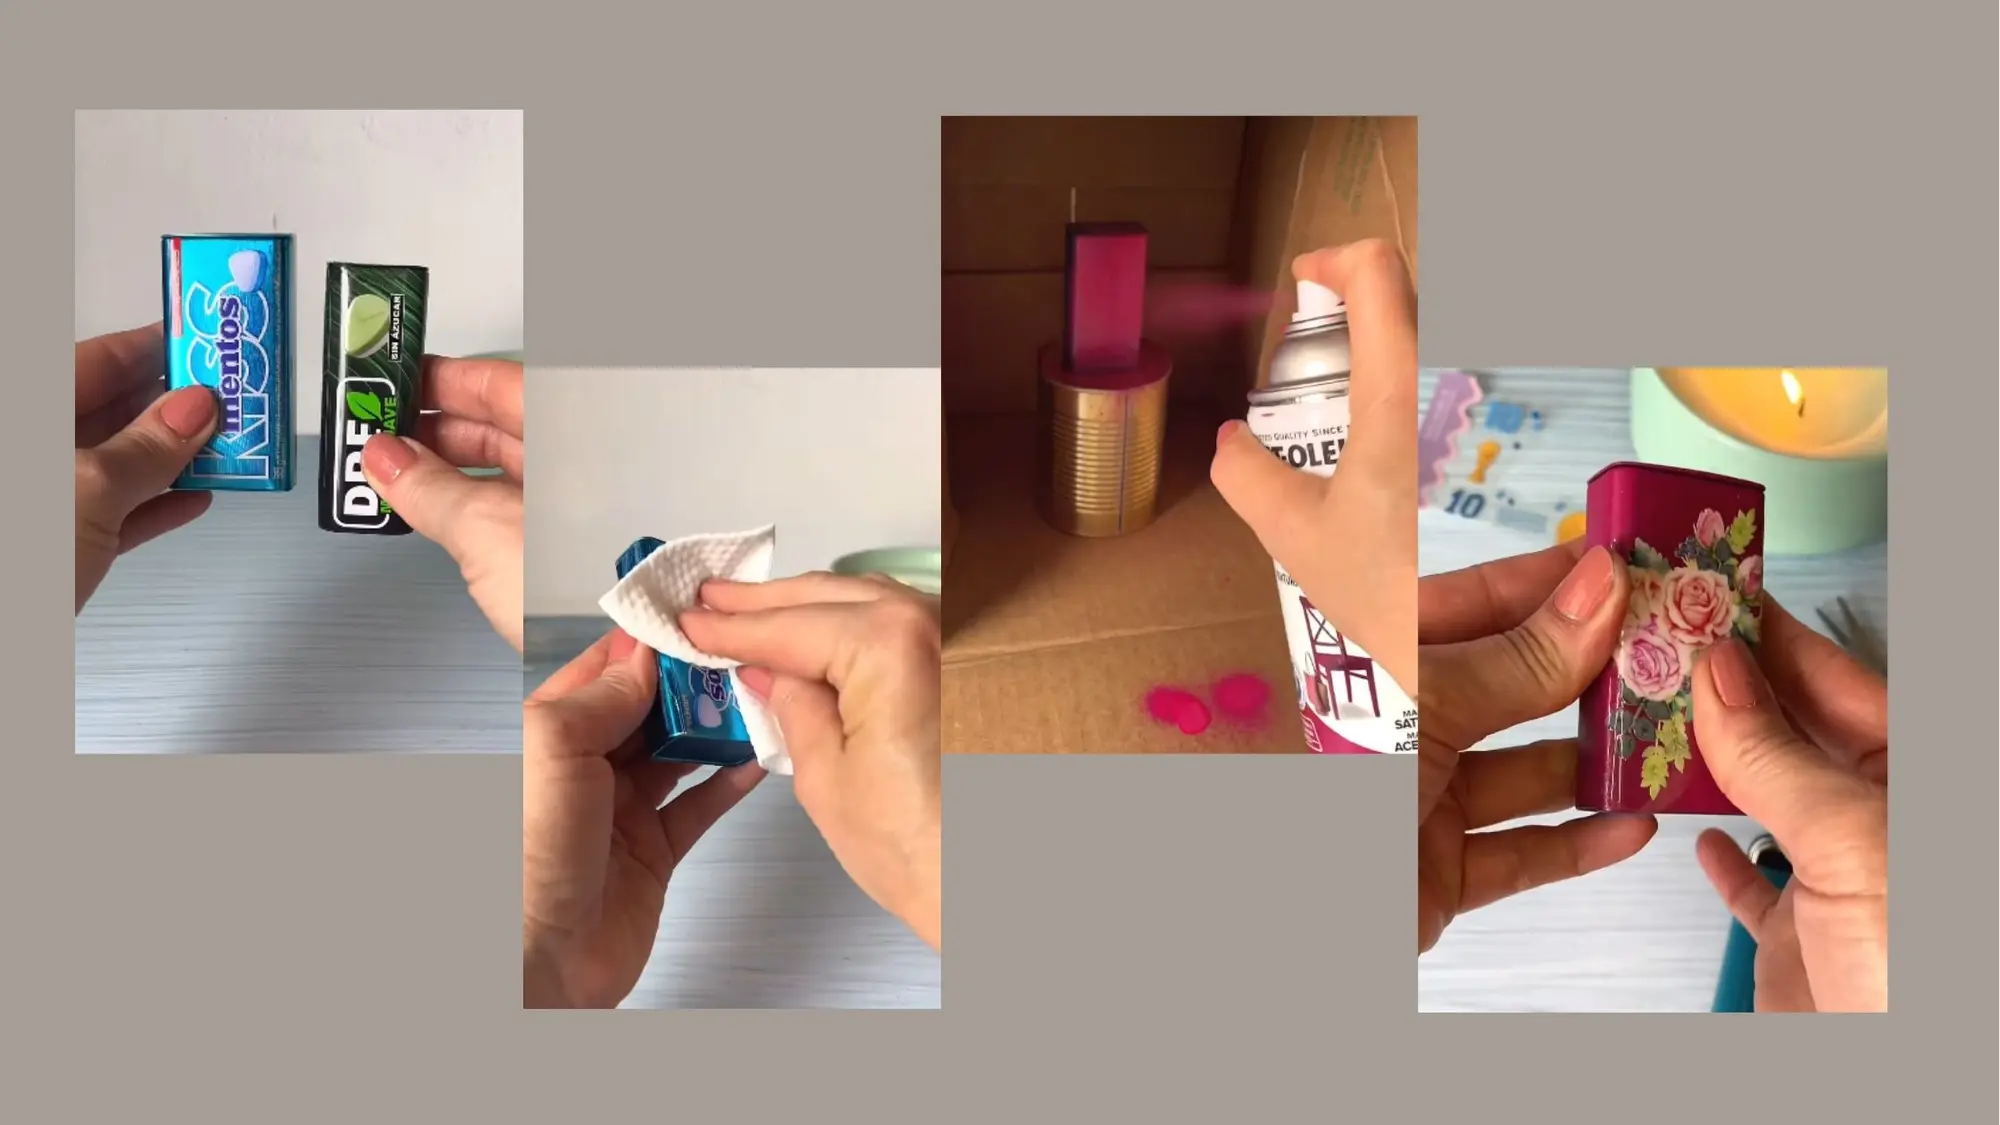
Take the empty mint-pill tins and clean them very well with a damp cloth or with a bit of alcohol to remove any residue or grease.
-
Gently rub the exterior metal surface with fine sandpaper; this will help the paint adhere optimally and not peel off easily.
2. Spray Painting
-
Place the tin on a safe base (such as an old can inside a cardboard box to protect the surroundings).
-
Apply a uniform coat of spray paint from a safe distance, making sure to cover the entire body and lid of the tin. Let it dry completely.
3. Incorporating the Ignition Area
-
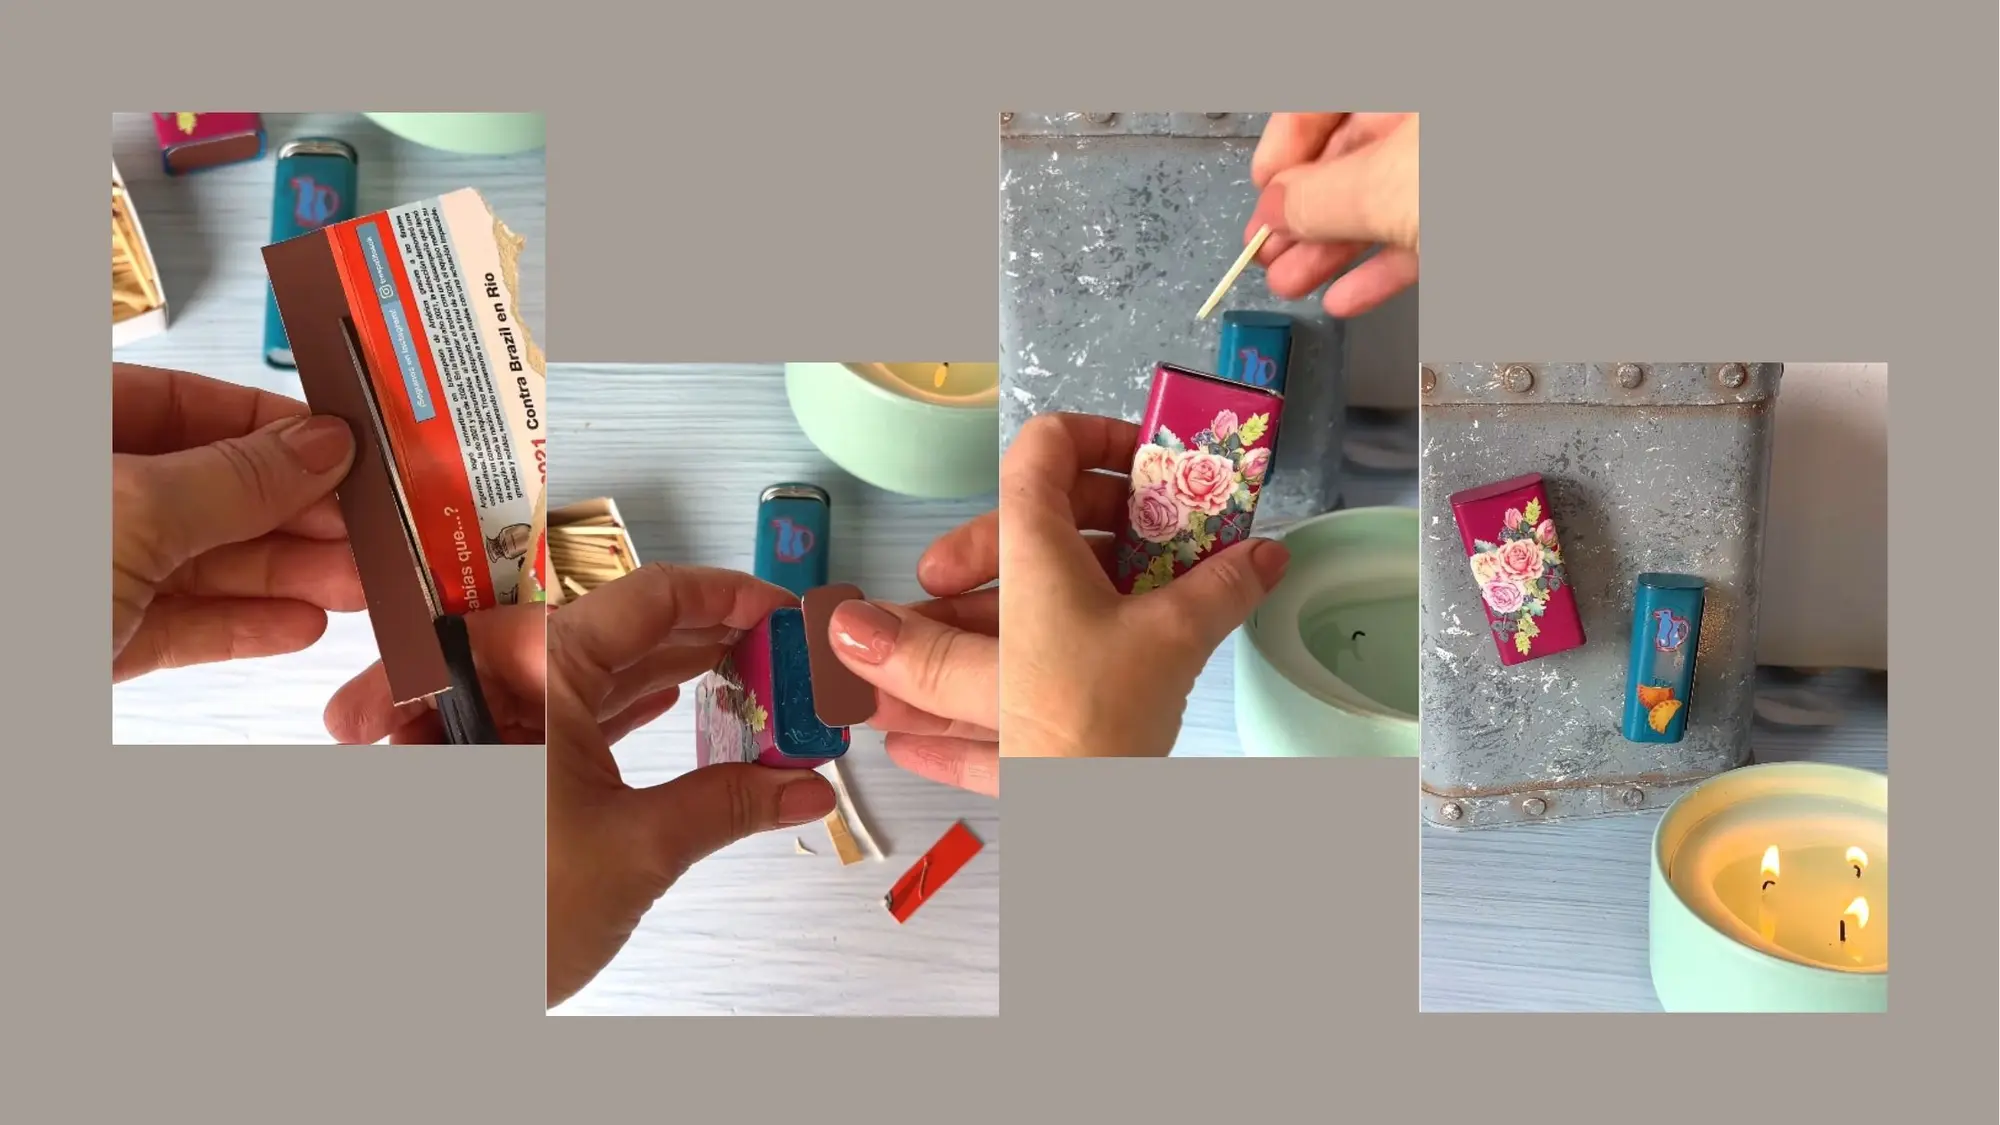
Cut a small strip from the striker area of a traditional matchbox.
-
Carefully glue it to one of the outer sides of the painted tin using strong adhesive, so you always have where to light your matches.
4. Decoration and Details
-
Personalize your new tin by sticking a pretty sticker, a floral decal, or an aesthetic design on the front to give it a unique, handmade touch.
5. Placing the Magnet and Final Fill
-
Secure a piece of flat magnet on the back of the tin with strong adhesive.
-
Fill the interior with matches, close the lid, and place it directly on your refrigerator door.
Decoration tip: You can make several tins with different designs and colors to gift or to organize small metal objects like hooks, buttons, or needles in your workspace.
Useful Caution
-
When spray painting, always do it in an open or well-ventilated space to avoid vapor buildup and protect your respiratory system.
